Adventure mode gives you the ability to go to places strewn about across the map. In each place there are different enemies that can be battled and different items to be collected; not to mention rare treasures, new materials, and Pets!
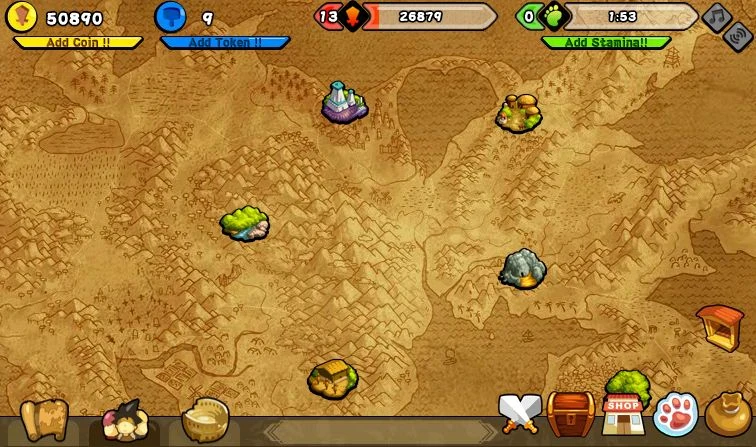
Note that during your adventures, you are limited by Stamina Points. Each step taken inside a location will drain Stamina, even walking to that location alone will cost you Stamina! (Shown in the top right corner in the picture)
Tip: In nearly all of the locations, there are usually elemental symbol shown on top of that location's image: that is the Favored Element for countering that location. There are various bonus stats for matching your group's Element with that sign! This can be achieved by equipping swords that have that same Element to all your party, but remember the Element of your Pet counts too.
Note* If your looking for a specific enemy, check out the Enemies section.
Adventure Experience[]
Throughout the game, you will level up and receive experience points similar to your workshop level. Rewards are given when you level up. Every level you receive +50HP, recover your max stamina and after various levels, you get a leadership point, which can be used to improve your Adventure stats
Combat System[]
The combat system in Adventure mode is quite straight forward.
- Three Red(Attack) orbs connected = 100% your AP dealt to enemy in damage, unless enemy uses a special skill that decreases damage. Healing by enemy interrupted.
- Four Red orbs connected = 150% of your AP dealt in damage. Healing by enemy interrupted.
- Three Blue(Defense) orbs connected = Damage reduced by 50% (minimum 10 damage), ailment blocked.
- Four Blue orbs connected = no damage received, ailment blocked.
- Three Light Purple(Healing) orbs connected = 10% of your HP recovered, one ailment removed (order predetermined)
- Four Healing orbs connected = 20% of your HP recovered, all ailments removed
- Three Tea(Skill) orbs connected = 150% of your AP dealt in damage, opponent stunned.
- Four Skill orbs connected = 200% of your AP dealt in damage, opponent stunned.
Damage you receive is as follows:
- Base Opponent damage + Base Opponent Damage modifier (suspected to be +- 10% of base damage) - your DP
- If the resulting damage is less than 20, you will be dealt 20 damage as 20 is the minimum you can receive.
- Beware that the ailments of "Wet" and "Oily" can cause you to receive double damage and cause an additional ailment if hit by Fire or Frost attacks.
| Orb | Attack | Guard | Heal | Skill | Miracle | Erase |
|---|---|---|---|---|---|---|
| Price(1) | 1,000 | 500 | 1,500 | 10 Smith Tokens | 10 Smith Tokens | 500 |
| Price(2) | 2,000 | 1,000 | 6 Smith Tokens |
Pets[]
For more info on Pets, you can check the general page, or click on any name for more specific information.
| Goldie | Cerberus | Damgun | Imo | KOB |
| Fifi | Julie | Bone | Gururu | Bahamut |
| Kala | Hope | Hanzo | Musashi | Apo |
Adventure Locations[]
In order to advance through the different locations, you will need to unlock them via the Heroine Quests. The main storyline of Adventure. Previously, each zone was unlocked by killing a boss, however that has been removed. Instead, the second way to unlock new locations is to defeat all three of the bosses in one location.
- Mysterious Mountain - (Complete Heroine Quest 1)
- Orc Camp - (Complete Heroine Quest 4)
- Cavern of Ancient Ruins - (Complete Heroine Quest 7)
- Cursed Forest - (Complete Heroine Quest 11)
- Mage Tower - (Complete Heroine Quest 12)
- Flaming Volcano - (Complete Heroine Quest 21)
- Polar Glacier - (Complete Heroine Quest 22)
- Imperial Tomb - (Complete Heroine Quest 30)
- Canyon of Immortality - (Complete Heroine Quest 35)
- Dragon Archipelago - (Complete Heroine Quest ?)
- Abyssal Sea - (Complete Heroine Quest ?)
- Impact Site - (Complete Heroine Quest ?)
- Hellgate - (Complete Heroine Quest ?)
- Skyland - (Complete Heroine Quest ?)
- Pandemonium - (Complete Heroine Quest ?)
- Divine Council - (Complete Heroine Quest ?)
- Heroic Route (Complete Heroine Quest 17)
Mastering location unlocks various bonuses:
- 1 Star: 1st Boss route - Need 3 Location Points
- 2 Stars: 2nd Boss route & Rare Items for sell in Store - Need 20 Location Points
- 3 Stars: 3rd Boss route - Need 30 Location Points
- 4 Stars: Rarer shop items - Need 50 Location Points
- 5 Stars: Mastery of location (Nothing happens) - Need 200 Location Points
Collectibles[]
Every location has a set of collectibles that can be obtained from green zones and killing bosses. Completing a set will give you rewards such as more stamina, adventure decor or +5 quality to the adventure materials. Several collections will also require to visit more than one location.
Status Effects[]
In all locations, you have a chance to be inflicted by a status effect. Status effects can make fighting monsters much harder as they will decrease your attack power by 25%(Scared) ,decrease your max hp(Demoralized) or cause other problems. The only way to cure a status effect is to match three heal orbs(heal 1 status effect), 4 heal orbs(all status effects), or use a consumable which can be bought at the Adventure Store.
Equipment[]
Equipment is the basis of an Adventure. You don't want to face a monster barehanded, or receive an attack from a Fire Elemental with your daily clothes, would you?
What you can equip is a Sword, Main Armor, Secondary and Accessories. They can be obtained fairly easily:
- Swords: can be equipped after you Weaponize them from the Workshop menu.
- You can weaponize a sword at any time. There are no level requirements to weaponizing a sword, and you do not have to have a saved one first.
- Main Armor and Secondary Armor: A basic set can be bought from Adventure Shop, however know that there is a very limited selection there. You will have to find the better armor available by yourself. Treasures dropped from the bosses is the most common way to get the better armor.
- Accessories: These are usually dropped by Bosses, they can boost AP and DP.
- The last type of 'equipment' you can equip is the Pet .
All swords have a certain amount of Sword Durability. When the durability reaches 0, the sword will always require Smith Tokens to repair or you can simply choose Discard, meaning it will be destroyed completely and permanently.
| Sword Type | Max Durability | Repair Cost | Broken Repair Cost |
|---|---|---|---|
| Rank D / Normal | 50 | 200 Coins | Smith Tokens |
| Rank C / Rare | 55 | 300 Coins | Smith Tokens |
| Rank B / Epic | 60 | 500 Coins | Smith Tokens |
| Rank A / Legendary | 75 | 800 Coins | Smith Tokens |
| Rank M / Master Sword | 80 | 1,000 Coins | Smith Tokens |
| Rank S / Divine | 90 | 1,500 Coins | Smith Tokens |
| Rank SS / God-Slayingc | 100 | 2,500 Coins | 3 Smith Tokens |
| Rank AA / Relic | 100 | 3,000 Coins | 3 Smith Tokens |
| Rank X / Chaos Swords | 100 | 4,000 Coins | 6 Smith Tokens |
Repairing your swords when it has 5 or lower durability will minimalize the loss of your money, but it also allows for a better chance for them to break. In some cases, destroying them is a better option, especially when you just start out.
Equiping certain items will give certain bonus effects; these are known as a Set bonus.
Another type of bonus you can obtain is an Elemental bonus. This is when you equip 4 or more swords of the same element.
Treasures[]
Treasure chests can be found by defeating bosses, they come in 2 forms either smaller treasure chests (1x1) or larger mysterious chests (2x2). These chests contain Relics and powerful Equipments.
Adventure Store[]
This is where you can purchase Consumables. the Rare Items, or even just Equipment. Check inside for more information.
Adventure Group[]

Your adventure group is composed of you, four other players, and a pet. When you start the four slots in your group will be filled by NPCs until you invite other players, and your pet slot is empty until you find a pet. Each person in your group can equip a sword, main armor, and secondary armor, but only other players can equip accessories. Which players you add to your party does not matter as their level and equipment have no effect on your group's stats.
You always have the role of Leader which means the Attack and Defense of your equipment is doubled. Two of your party members will have the role of Attacker which means the Attack of their equipment is doubled, and the other two have the role of Tank which doubles the Defense of their equipment.
Many weapons (and all pets) have elements associated with them. When at least 4 of your characters (including pets) have the same element, your party has that element. Each element gives a special bonus to your groups stats. If your party element matches the element of the current location, there is an additional bonus to your stats.
Leadership Points[]
Every six levels, you are given one leadership point. These can be used to raise your Courage, Tactics, Perserverence, Momentum or Improvisation. The following table outlines what benefit each level provides.
Note:* This is not cumulative. I.e. Having Tier 2 in Attack does not give you +35 attack, just +25. The amount listed under each tier shows the total bonus. Also, even though you, as the leader, pick the boosts, they are a group bonus, as such, they receive no *2 boost.
|
Tier 1 @ lvl 1 |
Tier 2 @ lvl 1 |
Tier 3 @ lvl 21 |
Tier 4 @ lvl 31 |
Tier 5 @ lvl 41 | |
|---|---|---|---|---|---|
| Courage (Max HP) | +100 HP | +150 HP | +250 HP | +300 HP | +400 HP |
| Tactics (Attack Orb %) | +1% | +2% | +3% | +4% | +5 % |
| Perserverence (Stamina) | +2 STA | +3 STA | +5 STA | +6 STA | +8 STA |
| Momentum (Group Attack) | +10 ATK | +25 ATK | +45 ATK | +70 ATK | +100 ATK |
| Improvisation (Group Defense) | +5 DEF | +15 DEF | +30 DEF | +50 DEF |
+75 DEF |
Adventure Materials[]
There are some materials that cannot be bought from either the normal Shop or Black Market, they can only be dropped by some enemies or collected from Locations. More will be added as they are unveiled!
Relic Fusion[]
A new type of fusion that requires materials found in Adventure. Relic Fusion takes 3 Legendary-class Swords plus one Relic item that is found from the Mysterious Chests and the Legendary Chests that are dropped by location bosses or bought at the Adventure Shop after mastering a route to 4 stars. Each Relic is material-specific and the Artifact Sword it produces comes with one-page Manga to view.
Goals[]
Recently added, Goals help provide direction as well as offer some very nice rewards for the beginner adventurer.